How to Set Up a Home Wi-Fi Network
Our simple step-by-step guide to getting connected
Sep 11, 2023 | Share ![]()
![]()
![]()
Equipment Guides, FAQ, Technology
Setting up Wi-Fi in your home or office is easier than you may think. All you need is an internet connection from an internet service provider, a modem, a wireless router, and a computer or smartphone. Let’s walk through the steps of setting up your Wi-Fi network.
Part 1: Get an internet connection
You can look up and compare internet service providers (ISPs) in your area with our handy zip check tool.
If you don’t have a home internet connection already, it’s time to get hooked up.
Many providers allow you to sign up online or by calling a customer service representative. One perk to getting a new internet connection set up is that during installation, a professional may set up your whole home network for you.
Pro tip:
If you want a detailed walkthrough on how to choose an internet plan, check out our guide to choosing an ISP. But basically, you need to consider availability, speed, and cost.
Part 2: Set up your modem
Your modem is an essential part of your home network. It translates the internet signal that comes into your home from the ISP. You may also have an internet gateway, which is a modem/router combo unit—these are especially common if you rent your equipment from your ISP.
Pro tip:
Need a modem for gigabit internet? Check out our guide to the best gigabit modems.
To connect your modem or gateway to your home internet connection, find your main internet line.
Cable internet: Your main line is a coaxial outlet or a coaxial cable protruding from the wall.
DSL internet: Your main line looks similar to a phone jack.
Satellite internet: Your main line is probably a coaxial cable or an Ethernet cable.
Fiber internet: If you have fiber direct to your home, your main line goes to an Optical Network Terminal (ONT). From there, the signal goes to a router via an Ethernet cable or a coaxial cable.
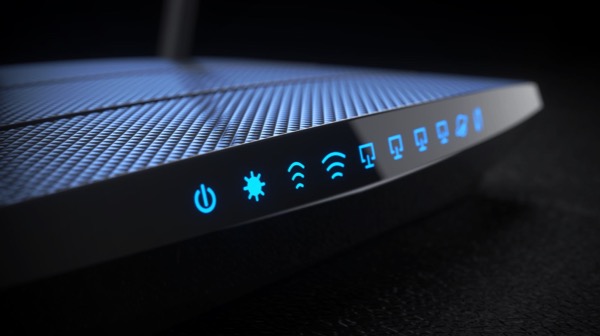
Once connected to the internet source and plugged in, check your modem’s status lights. It can take a while for things to come fully online. You may have to call your internet service to activate the modem (basically to make sure the network recognizes the modem).
Pro tip:
You can connect a computer directly to your modem with an Ethernet cable to make sure your internet is working properly. But we don’t recommend using a direct modem connection for regular internet use because your other devices can’t access the internet at the same time without a Wi-Fi network. You also bypass the critical security features built into your router when you connect directly to a modem.
Part 3: Set up your wireless router
Your wireless router manages your home network. It creates your Wi-Fi network, assigns IP addresses, organizes traffic, and makes sure all your data goes to where it’s supposed to go. You want to make sure your router supports certain Wi-Fi standards (Wi-Fi 5 or 6) to get the most out of your internet service. There are many factors to consider when choosing a router; see our article on the best routers if you need some help making a decision.
Step 1: Connect your wireless router directly to your modem with an Ethernet cable and turn it on. (Skip this step if you’re using a gateway.)
Step 2: Wait for the equipment status lights to show that the modem is connected to the internet.
Step 3: Find your wireless router’s default IP address and log in to your router. The default IP address is typically labeled on the back or bottom of the router. When prompted, enter your router’s login credentials, which are also typically labeled on the router. For more help with this step, consult our guide on how to log in to your router.
Step 4: In your wireless router’s user interface or app, set up your Wi-Fi network’s name (SSID) and password. If your router has multiple Wi-Fi bands (usually 2.4 GHz and 5 GHz), do this for each band.
Step 5: If your wireless router offers more advanced features like scheduling, guest networks, or user profiles, set those up now as well.
Sign up for our newsletter. Get more from your internet.
Have a better, faster, more secure experience with your internet.
By signing up, you agree to our Privacy Policy & Terms and Conditions.
Part 4: Connect your devices
It’s time to get online. You have two options for connecting your internet devices: wired Ethernet connections or Wi-Fi.
How to connect to Wi-Fi
Accessing Wi-Fi is easy on nearly every device.
iOS/iPadOS
Step 1: Tap Settings.
Step 2: Tap Wi-Fi.
Step 3: Tap on the network’s name.
Step 4: Enter the network’s password.
Android
Step 1: Swipe down from the top to expand the Notification Shade and tap on the “cog” icon. This opens the Settings panel.
Step 2: Tap Wi-Fi.
Step 3: Tap on the network’s name.
Step 4: Enter the network’s password.
Android (Samsung)
Step 1: Swipe down from the top to expand the Notification Shade and tap on the “cog” icon, This opens the Settings panel.
Step 2: Tap Connections.
Step 3: Tap Wi-Fi.
Step 4: Tap on the network’s name.
Step 5: Enter the network’s password.
Step 6: Tap Connect.
Windows
Step 1: Click on the Wi-Fi icon displayed on the taskbar.
Step 2: Click on the network’s name listed on the pop-up menu.
Step 3: Click on the Connect button.
Step 4: Enter the network’s password.
Step 5: Click on the box next to Connect Automatically if you want to autoconnect.
macOS
Step 1: Click the Wi-Fi icon displayed on the menu bar.
Step 2: Click on the network’s name listed on the drop-down menu.
Step 3: Enter the network’s password.
Step 4: Click Join.
How to connect via Ethernet
Wired connections are good for your most important connections—like a home computer or gaming console. Simply plug an Ethernet cable into one of the LAN ports on your router and plug the other end into an identical port on your device. If your device doesn’t have an Ethernet port, you can use an adapter. Here are a few suggestions:
If there aren’t enough Ethernet ports on your router, add an Ethernet switch to expand your network.
Author - Rebecca Lee Armstrong
Rebecca Lee Armstrong has more than six years of experience writing about tech and the internet, with a specialty in hands-on testing. She started writing tech product and service reviews while finishing her BFA in creative writing at the University of Evansville and has found her niche writing about home networking, routers, and internet access at HighSpeedInternet.com. Her work has also been featured on Top Ten Reviews, MacSources, Windows Central, Android Central, Best Company, TechnoFAQ, and iMore.
Editor - Aaron Gates
Related Posts